7 Tips for Scratch Resistant Surfaces in Busy Kitchens

Time:2026-09-22 Author:Amelia
0%

Busy kitchens test every surface. Knives slide across counters, cast-iron pans land heavily, and gritty crumbs travel beneath cutting boards. These small events can leave dull lines, chips, or permanent marks within weeks.

This guide explores seven practical tips for choosing and maintaining Scratch Resistant Surfaces For Busy Kitchens. Materials engineer Dr. Elena Marquez offers a useful reminder: “Scratch resistance is not invincibility; it is a surface’s ability to keep performing after repeated contact.” That distinction matters. A scratch-resistant finish can reduce visible damage, but careless cleaning, sharp particles, and excessive force still create problems.

Look closely.

Imagine a commercial-style island after a long dinner service. Flour dust clings to the edge, a metal whisk rests beside spilled sauce, and a ceramic bowl scrapes across the worktop. The right surface should handle these moments without losing its texture, color, or hygiene-friendly finish. Porcelain, quartz, treated stainless steel, and selected solid-surface materials may perform well, depending on their construction and care requirements.

Still, product labels can oversimplify real kitchen conditions. “Scratch-proof” sounds reassuring, but it may encourage poor habits. A rough pan can damage even a strong finish. This guide therefore considers more than laboratory claims. It examines daily handling, cleaning tools, edge protection, installation quality, and realistic maintenance.

Some advice may feel obvious. Yet obvious habits are often forgotten. Use cutting boards, lift heavy cookware, remove abrasive grit, and follow the manufacturer’s care instructions. Small choices protect expensive surfaces. They also preserve the practical character of a kitchen built for constant use.
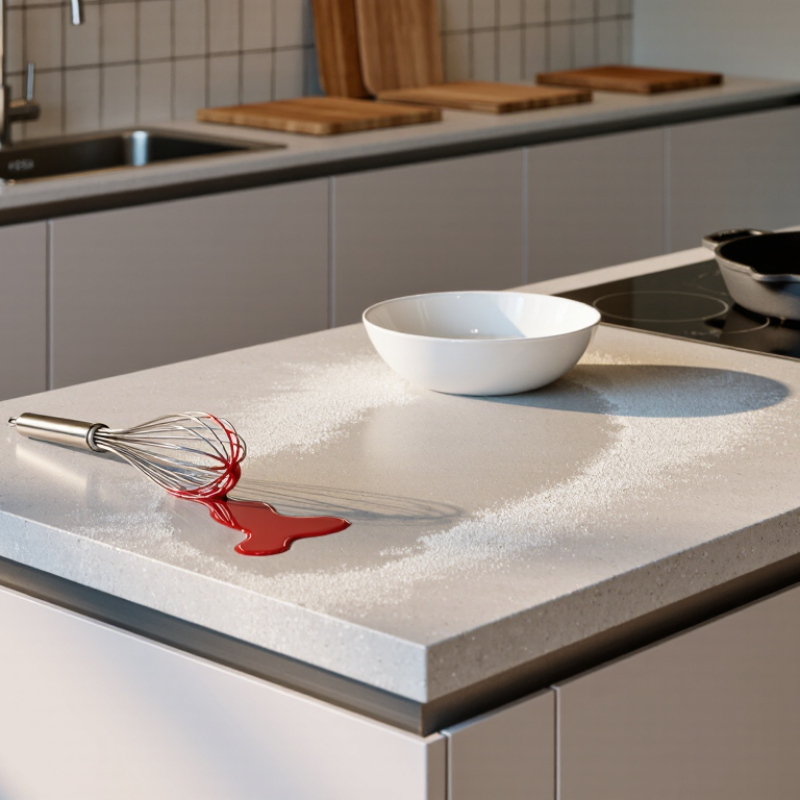
7 Tips for Scratch Resistant Surfaces in Busy Kitchens

Understanding Why Kitchen Surfaces Develop Scratches

Scratch marks usually begin with friction, not dramatic accidents. A steel pan dragged across a counter can carry sand, grit, or dried food beneath it. These particles act like tiny cutting tools. Repeated contact gradually removes the surface finish, especially near sinks, cooktops, and busy preparation zones.

Material structure also matters. Softer surfaces can deform under pressure, while glossy finishes reveal shallow marks more clearly. Heat, moisture, and harsh powders may weaken protective coatings over time. The 2024 U.S. Houzz Kitchen Trends Study reports that 76% of renovating homeowners upgraded their countertops, showing how heavily these surfaces are used and replaced. Yet replacement does not solve poor habits. Use lifting motions, soft trivets, cutting boards, and clean microfiber cloths. Felt pads can help, but trapped grit makes them less effective. Clean spills quickly. Do not scrub blindly.

I once blamed the countertop alone. That was incomplete. A rough ceramic base, a metal utensil, or one grain of quartz-like grit may create the visible line. Manufacturers and laboratories evaluate abrasion resistance through standardized methods, including ASTM C241/C241M for stone materials. However, test performance cannot perfectly predict a crowded kitchen. Inspect the surface under side lighting, identify the scratch source, and adjust the workflow before choosing a repair method.

7 Tips for Scratch-Resistant Surfaces in Busy Kitchens

Understanding Why Kitchen Surfaces Develop Scratches

Surface hardness is one important factor in scratch resistance. The chart compares representative Mohs hardness values: a higher value generally means that a material is more difficult to scratch with common particles. Sand, ceramic grit, and mineral debris can still cause damage when dragged across a surface, so use cutting boards, lift cookware instead of sliding it, clean with non-abrasive tools, and remove loose particles before wiping.

Values are approximate reference values on the Mohs mineral hardness scale. Actual performance also depends on finish, coating, surface wear, impact, and cleaning practices.

Choosing Scratch-Resistant Materials for Heavy Kitchen Use

Busy kitchens punish attractive surfaces. Choosing scratch-resistant materials requires more than comparing color samples. Daily contact with cast-iron pans, sharp utensils, grit, and appliance movement creates real testing conditions.

In renovation projects, dense porcelain slabs often perform well around cooktops and preparation zones. Their hard surface resists knife marks and dragging cookware, although sudden impacts can chip exposed edges. High-quality quartz surfaces also handle regular chopping and serving, but they still need protection from abrasive dust and heavy objects. Solid stainless steel suits intense cooking areas because minor marks blend into its working finish. Polished surfaces show damage more clearly. Honed or textured finishes can be more forgiving.

Ask how the surface behaves after years of cleaning, not just after installation. Request technical data for scratch resistance, stain resistance, heat tolerance, and repair options. A sample test helps: slide a weighted pan, wipe away flour, and inspect the surface under bright side lighting. Do not use a knife as a formal test. It can create misleading damage. Edge design matters, too; thin corners are vulnerable when trays hit them. I once favored a glossy finish for easier wiping, then regretted it after seeing every fine mark near the sink. That mistake changed my preference toward practical textures. Even the strongest material needs felt pads, cutting boards, and sensible maintenance. No surface is truly scratch-proof.

Applying Protective Finishes to Extend Surface Durability

In busy kitchens, protective finishes help surfaces resist scratches, stains, and daily abrasion. They do not make counters scratch-proof. That distinction matters. A finish must match the surface, heat exposure, and cleaning routine. Water-based coatings suit many prepared wood surfaces, while stone sealers protect against staining rather than surface damage. Metal may need a clear protective layer designed for frequent handling.

Clean and degrease the surface before application. Even a thin grease film can weaken adhesion. Lightly smooth rough areas, then remove every trace of dust. Test the finish on a hidden corner first. Check color, texture, and drying time. Apply thin, even coats with a clean applicator. Thick layers often dry unevenly and may show cloudy edges. Allow full curing between coats, even when the surface feels dry. Follow the product’s technical instructions and ventilation requirements.

Use soft cleaning tools after curing. Grit trapped under a cloth can create fine scratches quickly. Place cutting boards and hot pads where work happens most often. Inspect high-use zones near sinks, handles, and preparation areas every few months. Reapply the finish before bare patches appear. I once rushed this step and left visible overlap marks near a sink. The repair took longer than the original coating. Protective finishes reward patience, although kitchen schedules rarely do. Regular checks still matter more than applying one heavy coat.

Using Safe Cleaning and Cutting Practices Every Day

7 Tips for Scratch Resistant Surfaces in Busy Kitchens

Using Safe Cleaning and Cutting Practices Every Day

In a busy kitchen, scratch resistance depends on small habits, not aggressive products. From observing daily preparation areas, I have found that grit causes more damage than ordinary use. Rinse loose crumbs before wiping. A soft microfiber cloth is safer than a rough pad. Use warm water and a mild, pH-neutral cleaner suited to the surface. Strong chemicals may dull finishes, even when changes are not immediately visible. Test unfamiliar cleaners on a hidden corner. It feels slower, but repairs take longer.

Tip 1: Clean in short cycles. Wipe spills soon after they happen, especially salty sauces, citrus juice, and oil. Dried residue encourages harder scrubbing. Use separate cloths for raw-food areas and finished surfaces. Wash them thoroughly after use. Never drag a pan, knife, or ceramic bowl across the counter. Lift it. That tiny pause matters. I sometimes forget during rushed preparation, which is why a clear cutting zone helps.

Tip 2: Cut only on a stable board, never directly on the countertop. Keep knives sharp and controlled; dull blades require extra pressure and may slip. Place a damp towel beneath the board if it moves.

Tip 3: Inspect the surface under bright side lighting each week. Fine lines can reveal abrasive habits early. Avoid powdered cleansers, metal scouring tools, and improvised scraping with keys or utensils. If a mark remains, stop and identify its cause before polishing. Guessing can worsen a small blemish.

Repairing Minor Scratches and Preventing Further Damage

In a busy kitchen, minor scratches often appear near the sink, prep board, and drawer pulls. I have found that early inspection prevents a small mark from becoming a rough, dirty-looking patch. Run a clean fingertip across the surface, then shine a flashlight sideways across it. If the scratch catches your nail, treat it cautiously. A deep groove may need professional assessment instead of home polishing. This distinction protects the finish and prevents wasted effort.

Start by removing grease with warm water and a mild, non-abrasive cleaner. Dry the area with a soft microfiber cloth. For a light surface mark, use a repair material approved for that surface type. Apply a small amount to a hidden test area first. Work gently in the original finish direction, using short strokes and very light pressure. Never use steel wool, harsh scouring powder, or a random abrasive pad. They can enlarge the scratch and create dull halos. Wipe away residue between passes. Stop when the mark becomes less visible; chasing perfection can cause more damage.

Prevention depends on small habits. Place a cutting board under heavy tools, and lift appliances instead of dragging them. Keep grit away from cleaning cloths, especially around the sink. Felt pads under containers can reduce repeated rubbing, but they need regular washing. I once ignored a crumb under a canister and made a longer line while moving it. That mistake was avoidable. Inspect high-use areas weekly, and repair moisture or loose hardware before movement causes fresh scratches.

7 Tips for Scratch Resistant Surfaces in Busy Kitchens - Repairing Minor Scratches and Preventing Further Damage
Tip Common Scratch Risk Recommended Prevention Minor Scratch Repair Avoid Suggested Frequency
1 Cutting directly on the countertop
Knives can leave visible grooves and may transfer food residue into damaged areas.
Use a stable cutting board with non-slip feet. Keep the board larger than the food being prepared so the knife remains on the protected surface. For a shallow mark on a solid, non-porous surface, clean and dry the area, then use the surface manufacturer’s approved fine abrasive or polishing method. Cutting directly on the worktop, especially with heavy pressure or serrated knives. Use a cutting board for every preparation task.
2 Dragging cookware or appliances
Cast iron, rough ceramic, and unglazed pottery can create abrasive contact.
Lift items instead of sliding them. Add smooth, clean protective pads beneath countertop appliances when appropriate. Remove loose debris first, then wipe with a soft microfiber cloth. For a light scuff, apply a compatible non-abrasive cleaner according to its instructions. Moving heavy pans across the surface or using pads that trap grit underneath. Check protective pads weekly and clean beneath appliances regularly.
3 Grit and food particles
Sand, salt crystals, and dried food can act like abrasive particles during wiping.
Remove particles with a damp cloth or soft brush before wiping the surface. Clean spills promptly. Wash with warm water and a mild, pH-neutral detergent. Rinse and dry to prevent residue from making the mark appear worse. Dry-wiping gritty debris or using rough scouring pads. Wipe after preparation and immediately after spills.
4 Abrasive cleaning tools
Steel wool, harsh scouring pads, and powdered abrasives may dull finishes or create fine scratches.
Choose microfiber cloths, soft sponges, or cleaning tools specifically approved for the surface material. Stop using the abrasive tool and clean the area gently. If the finish remains dull, use a material-specific refinishing procedure. Steel wool, aggressive scrubbing, and unapproved abrasive powders. Inspect cleaning tools monthly and replace worn or contaminated pads.
5 Improper repair products
A polish, solvent, or abrasive designed for one material may stain or damage another.
Identify the countertop or panel material before selecting a repair product. Test any cleaner on a hidden area first. For superficial scratches, follow the care instructions for the specific material. Deep, wide, or sharp-edged damage should be assessed by a qualified repair professional. Using automotive compounds, bleach mixtures, strong solvents, or untested sanding methods. Verify product compatibility before every repair.
6 Impact from heavy objects
Dropped cookware can cause chips, dents, cracks, or scratches around edges and cutouts.
Keep heavy items away from unsupported edges. Use two hands when lifting large cookware and place it down gently. Clean minor surface marks only after checking for cracks or loose material. Chips and cracks generally require a material-compatible filler or professional repair. Continuing to use a cracked surface or applying filler over grease, moisture, or loose fragments. Inspect edges, corners, and sink cutouts during routine cleaning.
7 Heat, moisture, and neglected maintenance
Excessive heat or standing moisture can weaken finishes, promote staining, or make existing damage more noticeable.
Use trivets for hot cookware, wipe standing water, keep seams dry, and follow the surface’s care instructions. Clean and dry the area first. Do not attempt to polish heat-damaged, swollen, cracked, or delaminated material without professional guidance. Placing hot pans directly on the surface or leaving wet cloths and spills in place for long periods. Dry after cleaning and inspect the surface at least once each month.

FAQS

What usually causes scratches on kitchen surfaces?

Friction causes most scratches. Grit, sand, or dried food can sit beneath a dragged pan. Repeated rubbing slowly removes the finish.

Which areas are most likely to show scratches?

Check around sinks, cooktops, preparation boards, and drawer pulls. These zones experience frequent contact, moisture, and movement.

Can heat and moisture make scratches worse?

Yes. Heat, moisture, and harsh powders may weaken protective coatings. A weakened finish can reveal shallow marks more clearly.

How can I tell whether a scratch is minor or deep?

Clean the area first. Run a clean fingertip across it, then shine a flashlight from the side. If your nail catches, proceed cautiously.

How should I treat a light surface scratch?

Remove grease with warm water and a mild, non-abrasive cleaner. Dry it with a soft microfiber cloth. Test an approved repair material in a hidden area.

What should I avoid during scratch repair?

Avoid steel wool, harsh scouring powder, and random abrasive pads. They may enlarge the mark or create a dull halo. Stop when visibility improves.

How can I prevent new scratches?

Lift pans and appliances instead of dragging them. Use cutting boards, soft trivets, and clean felt pads. Wash felt pads regularly because trapped grit can scratch surfaces.

Does replacing the surface solve the problem?

Not necessarily. Poor habits can damage a new surface quickly. I once blamed the countertop alone, but a rough base or hidden grit caused the line.

When should I seek professional assessment?

Seek help for deep grooves, spreading damage, or uncertain materials. Home polishing is not always suitable. A perfect-looking repair may create worse damage.

Conclusion

Creating Scratch Resistant Surfaces For Busy Kitchens begins with understanding how scratches occur. Frequent chopping, sliding cookware, abrasive cleaners, and heavy daily use can gradually weaken counters and worktops. Choosing durable materials designed for demanding kitchen environments is an important first step, while protective finishes can add another layer of resistance and help preserve the surface’s appearance. The best option should balance durability, hygiene, maintenance needs, and the style of the kitchen.

Everyday habits also play a major role in preventing damage. Use suitable cutting boards, lift rather than drag cookware, and clean surfaces with soft cloths and non-abrasive products. Avoid harsh scrubbing tools that may leave fine marks over time. When minor scratches appear, address them early with an appropriate repair method suited to the material, then continue using protective practices to prevent the damage from spreading. With careful material selection, proper finishing, and consistent maintenance, kitchen surfaces can remain attractive and functional despite constant activity.

Amelia

Amelia

Amelia is a seasoned marketing professional with a wealth of expertise in our company’s core offerings. With an unwavering passion for driving growth and innovation, she plays a pivotal role in shaping our marketing strategies and enhancing brand visibility. A key aspect of her responsibilities......